Disclosure: We may earn commissions at no cost to you from qualifying purchases made via the product links in this article.
One of the most frustrating things about working with screws is being unable to set them on the screw holes. This happens mostly when installing very tiny screws that are hard to grasp or when installing screw fasteners in very tight spaces.
Table of Content
It is also frustrating when screw fasteners drop in deep and hard-to-reach spaces when installing or removing them. These problems occur mostly when you do not use a screwdriver with a magnetic tip. Such screwdrivers keep your screws from falling. They also act as good pickup tools for small screws and fasteners.
A magnetic screwdriver is easy to find in hardware stores. You can also make one by magnetizing the tip of a regular screwdriver. All you need is a big or small strong magnet or a short telephone wire and a 9V battery. In this post, I will teach you how to magnetize screwdrivers in three easy ways.
Method 1: Magnetize screwdriver using a permanent magnet
Tools and materials
- Screwdriver
- Sheet of paper
- neodymium magnet or ferrite magnet or a magnetic parts tray
Step 1: Obtain a permanent magnet

You need a strong permanent magnet to induce magnetic properties on ferromagnetic material. You can remove one from a broken stereo or subwoofer if you have one lying around. There are also inexpensive permanent magnets such as neodymium magnets and ferrite magnets that you can find from online retailers such as Amazon.
Another option is to buy a magnetic parts tray that will serve two purposes. It will keep your fasteners and screws safe and you can use it to magnetize screwdrivers. A magnetic parts bowl is inexpensive as permanent magnets.
Step 2: Prepare the screwdriver and magnet
There isn’t much preparation for a screwdriver. Just wipe it with a damp cloth to remove any dirt or debris that may damage the magnet or finish on the screwdriver stem. Some screwdrivers have a chrome finish. Don’t scratch them.
On the other hand, the type of magnet you use determines how much preparation you need. If you are using a neodymium magnet or ferrite magnet, cover it with a sheet of paper to keep it from scratching the finish on your screwdriver.
Otherwise, if the magnet is on a part tray, you don’t need to wrap it with a paper sheet. Magnets in part trays come covered with nylon to protect surfaces.
Step 3: Magnetize the screwdriver
Hold the magnet in your left hand and the screwdriver in the other or vice versa. Strike gently and drag the screwdriver stem on the magnet in one direction. Repeat 10 to 15 times and make sure to maintain the same direction. Also, as you drag the screwdriver on the magnet, turn it a quarter a turn to increase magnetization.
For small screwdrivers, drag from one end of the shaft to the tip. Otherwise, start from the center of the stem to the tip.
Step 4: Test the newly magnetized screwdriver
After 10 to 15 strokes in one direction, your regular screwdriver is now magnetized. Test it by attempting to pick screws of different sizes with the tip. If screws stick on it, then you have successfully made a magnetic screwdriver.
Otherwise, repeat the process. Make sure the shaft of the screwdriver is ferrous by sticking the magnet on it. Some screwdrivers have non-ferrous shafts that cannot be magnetized.
The magnetized screwdriver should stay magnetized for a couple of months unless you choose to demagnetize it.
Method 2: Magnetizing a screwdriver with a tiny stick-on magnet
The second method for magnetizing a screwdriver is by sticking a small magnet onto the screwdriver stem. This keeps a regular screwdriver magnetized until the magnet is removed. However, the magnetic strength of the screwdriver depends on the size and magnetic strength of the tiny magnet. This method is useful when you don’t want to keep on magnetizing and demagnetizing the screwdriver using method 1 above.
Method 3: Magnetizing a screwdriver using electromagnetism
This method is based on the concept of electromagnetism. The concept explains how a moving electric charge produces a magnetic field around it. The magnetic field is what magnetizes a ferrous material. You can increase its intensity by winding the insulated conductor. So, when you place a screwdriver or any ferromagnetic object inside the coil, it becomes magnetized This is an easy method to magnetize screwdrivers if you do not have a permanent magnet handy.
Tools and materials
- Screwdriver
- 9V battery (available on Amazon)
- 10 inch long insulated telephone wire
Step 1: Strip the ends of the telephone wire
Use a stripping tool or utility knife to remove insulation from the wire ends. This exposes the conductor for electrical connection.
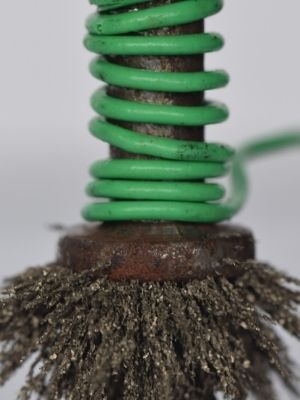
Step 2: Wind the wire on the shaft of the screwdriver
Leaving 2 inches of wire on each end, wind the stripped wire on the stem of the screwdriver. Eliminate gaps between the coils by squeezing together the first and last winding.
Step 3: Connect the coil to 9V battery
Connect one end of the coil to the positive terminal of a 9V battery and the other end to the negative terminal. Connect for about 10 seconds and disconnect. Do not interchange the terminals or you will demagnetize the screwdriver.
Step 4: Disconnect the battery and remove the screwdriver
Disconnect the coil from the battery after about 10 seconds. If you keep the connection longer, the coil will start to overheat.
Step 5: Test the screwdriver
Test the screwdriver to see if it has been magnetized successfully. Try picking some screws with the tip and see how long they stick on. If you are pleased with the magnetic strength of the screwdriver, you can wrap things up. If not, try using a longer wire to make more windings on the screwdriver shaft. This will increase the strength of the electromagnetic field.
How to demagnetize a screwdriver
Magnetic screwdrivers are good for installing screws and picking up small metallic objects but sometimes they can be a nuisance. They stick on ferrous surfaces or even damage components that should not be kept near magnetic fields. For this reason, you may want to demagnetize them to use them as a regular non-magnetic screwdriver.
Demagnetizing a screwdriver is very easy. Just drag the magnetic shaft on a strong magnet in a haphazard way a couple of times. This disorients the magnetic dipoles inside the internal structure of the screwdriver shaft. As a result, the screwdriver loses magnetic force and becomes demagnetized.
You can also demagnetize a screwdriver by heating it past the cure point. However, this method may destroy the magnetic properties of the screwdriver and you may not be able to magnetize it again in the future. Also, very high heat may damage the integrity of the screwdriver.
Another way to demagnetize a screwdriver or any magnetic material is by hammering repeatedly. It causes the atoms to vibrate and their magnetic moments to face different directions. As a result, the material loses its magnetic field.
Lastly, if you have magnetized your screwdriver by attaching a magnet onto the stem, just detach the magnet to demagnetize.
Frequently Asked Questions
Can a magnetic screwdriver hurt the motherboard?
So long as a magnetic screwdriver does have a strong magnetic field, it cannot hurt the electronics on a computer motherboard. In fact, it is the right tool for handling those tiny screws that get lost between the fingers. That being said, screwdrivers with a strong magnetic field can mess with some components in the motherboard circuitry
Can a magnetic screwdriver damage the hard drive?
Most magnetic screwdrivers do not have a strong magnetic field to cause damage to a hard drive. So, you can use them to install or remove hard drives from computers. However, avoid keeping a strong magnetic material near the hard drive because it can erase store data. This is because magnetic hard disks use magnetization to write and access data.